Dealing with and identifying the cause of skipped stitches can be a major pain. Have you ever been in the middle of a sewing project when your machine decided it didn’t want to sew with you?
Not battling with the sewing machine, but rather, making something uniquely you, be it an article of clothing, an accessory, or a lovely house decoration, is where the fun of sewing lies. Nothing quite puts a spanner in the works when your machine misses stitches.
Skipping stitches can be as simple as skipping one stitch or as complex as skipping several stitches in a row. Sometimes the machine will be stitching along normally, and then all of a sudden it will skip a few stitches, and then it will start stitching normally again. When a sewing machine is having these issues, the primary causes aren’t always obvious.
Here are some of the most common causes of this skipping problem, with solutions.
1. Problem With Needle
Using the incorrect needle in a sewing machine is the most common cause of stitches being skipped. The needle in the sewing machine should be checked first.
- Is the needle the correct fit for the machine and fabric?
- Is the needle tip broken or is the shaft bent?
If you answered yes to any of these questions, then this can cause the sewing machine to abruptly start producing skipped stitches.
Skipping stitches can happen if you sew fabrics with the wrong needle – for example, a jersey needle from the last project or if the jeans needle is still in the machine and you’re sewing thin cloth. When a sewing machine’s needle is too thick, too thin, or hasn’t been adjusted for the cloth, the result is a sloppy or skipped stitch.
Broken needles in sewing machines are another common cause of lost stitches – for obvious reasons. The needle doesn’t need to be completely snapped in two – just a slightly damaged tip or bend would do.
How to Fix
Thus, if your sewing machine suddenly begins skipping stitches, you should first try a new needle and adjust the machine’s strength accordingly. A collection of universal needles in varying strengths should always be kept as a backup for your sewing machine. For your convenience, a suitable replacement needle is always at hand.
Keep in mind that a sewing machine needle is just a small bit of metal, and it’s possible that it got bent when the fabric was tugged or when the machine hit a pin.
Frustration can be avoided if you take care of the needles for your sewing machine.
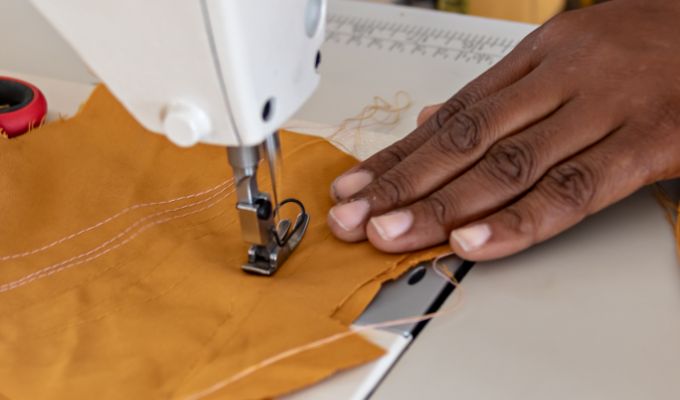
Sewing safely requires that you double-check that the cloth is being properly directed by the feed dog and that you are not trying to manually move the fabric with too much, shall we say, enthusiasm.
The machine needle can flex with even minimal tension on the fabric. So, the rule of thumb is to let the machine do the work, and don’t force-feed the fabrics.

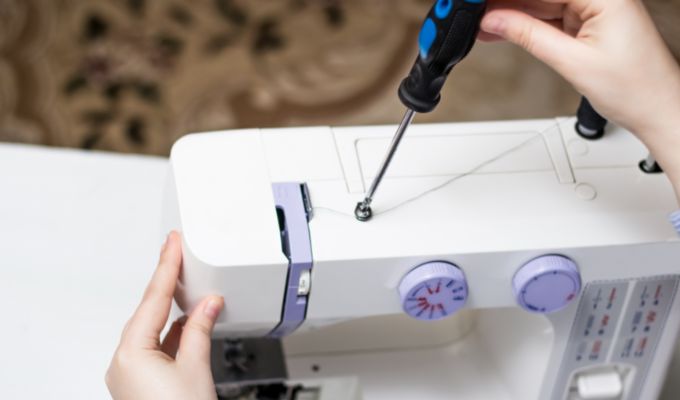
Seating Needle
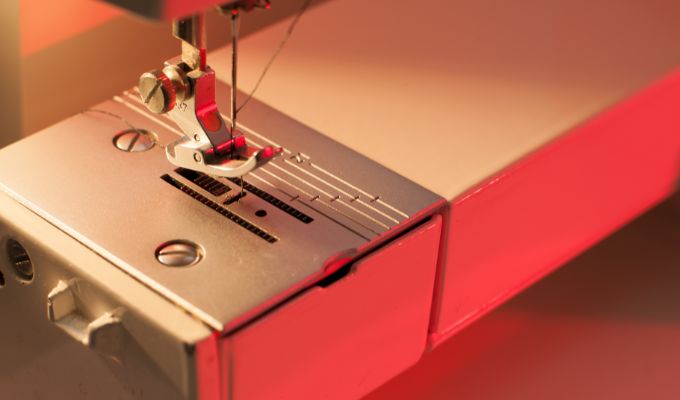
The needle’s seating in the needle bar might also cause stitches to be skipped. Pulling out and re-inserting the needle may help if you are experiencing skipped stitches despite using the appropriate needle for the fabric, thread, and technique you are employing.
Make sure it’s not in the wrong place, rotated awkwardly, or not pushed in all the way to the top. All of them can lead to the bobbin thread not hooking up properly with the top thread, which in turn results in skipped stitches.
2. Check the Threads
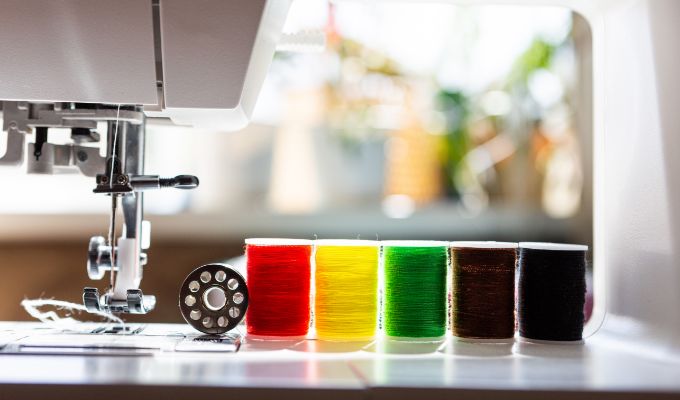
Is the thread good quality? I know it’s hard to resist the cheap, brightly coloured spools of thread from the craft store, but please use quality thread whenever possible.
Although at first glance, both high-quality and low-cost sewing thread may appear identical, the difference in quality is readily apparent upon closer inspection.
In general, low-priced sewing threads are unbalanced and poorly twisted. Frequently, these threads are made of short fibres that tangle easily and either unravel or tear when sewn. There is an unattractive and sometimes uneven quality to the seams.
The Solution
Don’t lose hope; get rid of that old, low-quality thread. I know that some people still want to sew with their grandmother’s old yarn, but what’s the point if the threads always break, the knots never untangle, and the seams never look good? Get rid of it!
A high-quality thread is always something to think about. Although many people think the quality of thread doesn’t matter, a closer look at the microscopic differences between the many types of sewing thread can change their minds.
Skipping stitches when using specialised thread doesn’t imply your machine can’t handle it, but it can be difficult.
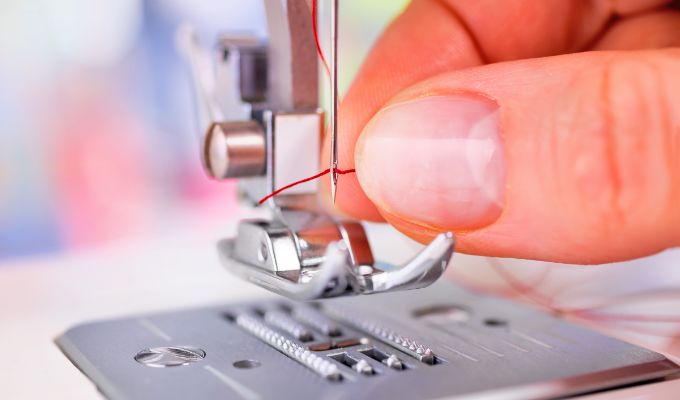
3. Think Threading
If you are using a sewing machine, you should double-check the thread. If there is a mistake in the top thread, it will likely result in a knot in the lower thread.
If for whatever reason, the upper thread becomes dislodged from its threading path, the sewing machine will quickly lose its ability to produce a neat seam.
The sewing machine may start eating the fabric or making stacks of loops on the back of the fabric without warning. If this is the case, you need to unthread the sewing machine from the top.
However, the top thread isn’t the sole possible culprit.
The bottom thread must also be properly wound and seated in the bobbin casing. Checks to see that the bobbin is loaded into the bobbin case the right way around.
Sewing machines have small pictograms on them that show how to insert the bobbin – all Brother sewing machines have this – which is helpful for beginners.
If using plastic spools, this is very important to remember. Damage can also occur if the spool’s size has changed, as evidenced by wear along the plastic’s edges.
Even a minimal enlargement or contraction will cause the coil to jiggle inside the housing, which in turn alters the voltage. It is also advised that the top and lower threads always be the same. This can become problematic if you utilise yarns that vary in thickness or quality.
If you’ve run out of options, unthread it and try again. Ev pick a new and improved yarn. Verify the bottom thread, and rewind and re-insert it if required.
4. Thread Tensioning
By sticking to a regimen, you can delay the onset of symptoms that point to more serious mechanical issues. Having a set process for beginning and completing your sewing projects is helpful. Check the thread tension on your sewing machine frequently.
Perhaps you made a tweak during your last sewing endeavour and forgot to put it back in its original state. It’s a good idea to double-check the thread tension before beginning sewing and to reset it to its default setting once you’re done.
The default setting for your sewing machine is brand and model specific. In most cases, the upper thread’s tension should be between 3 and 5.
The discs’ tension can be adjusted as needed thanks to the springs and screws holding them in place.
In addition, the basic setting on many sewing machines is marked in some way, making it easy to discover again without consulting the manual.
Computerized sewing machines typically provide an automatic thread tension adjustment in addition to the traditional manual method. Even in this case, it’s important to double-check that everything is functioning as it should and hasn’t been accidentally reset.
When multiple individuals are using a sewing machine, it’s especially crucial that they all clean up after themselves so that the following person doesn’t have to deal with any issues right away.
Quick Fix
Checking the thread tension is a simple step that is often neglected. Also, that’s not everything. Unfortunately, the tension disc doesn’t always do a good job of snatching the thread during stitching.
It’s preferable to unspool everything and start over with a new thread. Verify the bottom thread and rewind/reinsert as needed.
Adjust the tension on your sewing machine if you find that the stitches look different from the top and bottom of the fabric. If you want to know how to change the tension on your sewing machine, your best bet is to look in the handbook.
5. Feed Dog
You’ve turned on the sewing machine like you always do and are ready to begin, but nothing happens. That, too, is entirely possible. It’s time to use the transporter! Since we don’t give it much thought and just assume it will work, it goes about its business with no fanfare. As soon as we sew over it, it will be hidden from view as well.
There is a straightforward answer to this problem as well. The feed dog could be in a lowered position. As such, it is hidden beneath the cricoid cartilage and does not rise to the surface. This has led to the end of the transportation of textiles.
The feed dog can be lowered by using the lever located on the back of the sewing machine.
The “up” position is the proper one. Is it possible that you, or someone you know, have been quilting lately? Because if quilting, it is lowered. When you’re done quilting, you need to put the lever back in its regular position to engage the feed dogs. As a result, the sewing machine is unable to complete any stitches.
Many times, your line of sight is confined to the top of the sewing machine. This is where the settings are made and where the stitching process begins. The power switch and thread cutter are located on the side of the sewing machine. Who, though, is checking out the equipment from behind?
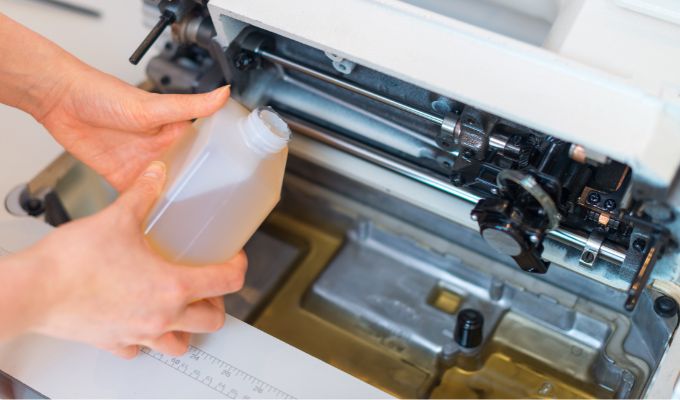
6. Dirt and Lint Build-up
Regular cleaning of your sewing machine with the brushes provided is essential for optimal performance. If the machine gets too unclean, the mechanics may have trouble moving, resulting in skipped stitches.
To learn how to clean your equipment effectively, consult the instructions that came with it. Needles, presser feet, throat plates, and bobbin cases may need to be removed to gain access.
Always choose a low lint thread, ideally one that has been double gassed, to prevent lint from accumulating in your machine. Cotton threads can be treated in this way to produce a lint-free thread that is ideal for your sewing machine.
Avoid low-lint-looking threads that haven’t been gassed. It’s possible that the manufacturer smeared adhesive or residue on the thread, which compresses down the lint and gives the item the illusion of having a low lint count.