Adjusting the thread tension on your sewing machine is the key to getting a professional-looking and sturdy seam.
The tension between the needle and bobbin threads should be equally matched. You’ll need to make this modification whenever your stitches are uneven, whenever you switch to a new thread, cloth, or needle, and whenever you do certain procedures involving stitching.
Read on if your sewing machine’s thread tension is causing you problems and needs adjusting and, how to do it.
Deciding if Your Thread Needs Tensioning
Threads making loops and poorly formed stitches are often a sign that your sewing machine’s tension needs adjusting. Observing these abnormalities will give you clues on which thread to adjust.
If the tension is correct, the seam on both sides of the cloth will the same; the pieces of fabric that have been sewn together won’t shift, and the upper thread won’t be visible on the wrong side of the seam (and vice versa).
Telltale Symptoms of Under Tight Upper Thread
- Poorly formed stitches can be seen on the bottom
- Needle thread appears on the underside of the seam.
- Top side stitches are forming loops
- The stitching comes apart easily
These symptoms suggest that you need to tighten the top thread tension (also known as “needle thread,” as it is the thread that travels from the spool to the needle).
Warnings of Over Tight upper thread
- Needle holes from loops
- Top stitches are not neatly formed
- Bobbin thread appears on top of the seam
- Fold form around the seam
- By gently pulling on the cloth, you can break the seam
The upper thread tension is excessively tight. Therefore, you should loosen the top thread tension.
Too Much Play in the Lower Thread
Large tangled loops have formed in the lower thread, which indicates that the bobbin thread tension needs to be tightened. The bobbin thread is the thread that emerges from the metal case under the needle’s plate.
Tightening the Upper Sewing Machine Threads
Two methods, listed below, can be used to fine-tune the thread tension:
1. Modifying the topmost thread’s tension (needle thread).
2. Adjust the bottom thread’s tension to complete the task (bobbin thread). This modification is seldom implemented. Most of the time, a balanced tension may be achieved by simply altering the top thread’s tension.
A wheel on the front of the machine is used to control the tension on the top thread. This dial may be found next to the top threading system, and features numbers zero through six (or more if your machine has the option). An “auto” or “A” setting on your dial indicates that your machine is regulating the tension for you. Try out your seam here first.
The dial for adjusting the tension is not the same as the dial for adjusting the stitch length. Read your sewing machine’s handbook if you’re unsure of where the knob to alter the thread tension is located.

Fine-Tune the Thread Tension up Top:
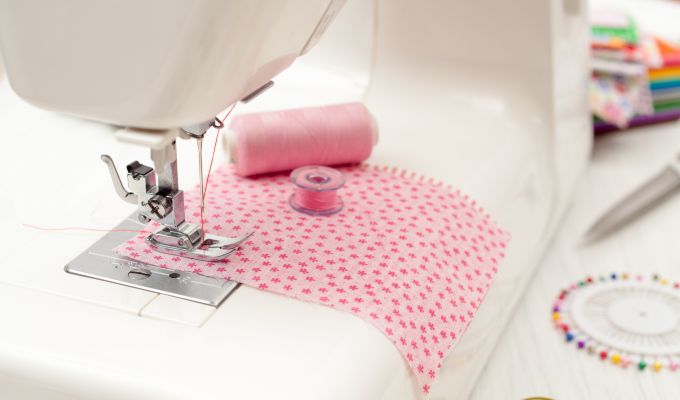
- Create a short trial seam of around 10cm in length using the final garment’s thread, fabric, and needle.
- Take note of any irregularities along the seam.
- In order to achieve the desired effect, you can either slightly reduce or increase the voltage:
Tightening the thread (increasing tension) involves moving the dial to the right (to a higher number, for example, from position 4 towards position 5).
Loosening the thread (reducing tension) is accomplished by moving the dial to the left (to a lower number, for example, from position 6 to position 5).
It may be necessary to do these steps many times to achieve the desired result.
Due to their sensitivity, the tension discs require very fine adjustments of only a few millimetres on the dial.
Verify the Lower Thread Tension
Increasing the bottom thread (bobbin thread) tension may be necessary if adjusting the top thread tension is insufficient to provide a balanced tension. To make sure the bobbin thread tension is proper, do the following:
Solution 1:
- Remove the bobbin’s metal housing from the sewing machine.
- Make that the bobbin is properly threaded and placed in the casing.
- To remove the wire from its sheath, gently pull it.
- The tension is too low when there is no resistance when unwinding the wire.
- Too much tension exists if the thread is forced out with force, jerks, or breaks.
In order to determine if the thread tension is correct, you should unwind some of the thread and see if there is any resistance or jerks.
Solution 2: The “yoyo” technique
- Remove the bobbin case
- Lift the needle a couple inches.
- Keep the wire’s end in your hand, and suspend the box in the air, just like in the illustration.
- Just a little jolt will do it; give the container a shake.
- Weak tension is indicated if the thread unwinds suddenly and for more than 5 cm.
- The tension is too much if the thread does not unravel.
- If the thread unwinds the same amount, between 2 and 3 centimetres, each time, then the tension of the bottom thread is set properly.
Tensioning the Lower Threads
When increasing the top thread tension on a sewing machine fails to correct the problem, the lower thread tension should be adjusted. Typically, it is already calibrated for your sewing machine and rarely needs adjusting. If you often need to change the lower thread tension, it may be time to get your sewing machine serviced.
Because of its extreme sensitivity, the lower thread tension adjustment screw should be tightened or loosened by only a few millimetres at a time, exactly as with the higher one.
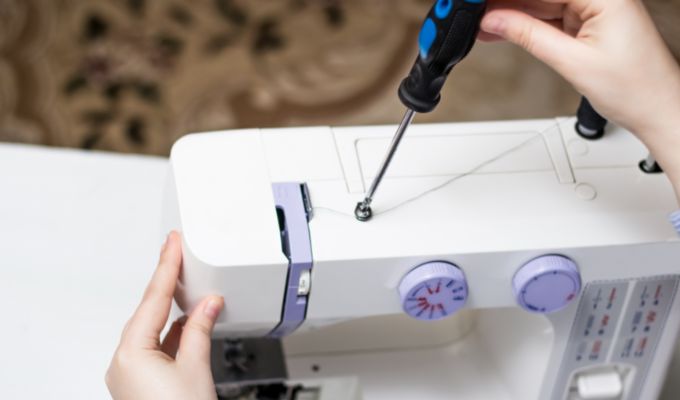
- Find the bobbin case screw that controls the tension:
- This is the one screw you’ll need if your case doesn’t have any others.
- This screw, if there are two, goes into the casing near the bobbin thread exit.
- Use the screwdriver that came with your sewing machine, or a precision screwdriver, to do the following:
- If you want more tension, turn the screw clockwise.
- The screw may be loosened by moving it counterclockwise to release some of the strain.
Please take into consideration that the lower thread tension cannot be adjusted in this manner on certain kinds of sewing machines due to the presence of an integrated box.
It’s either done in another way (a button or a wheel), or it can’t be done at all because the tension has already been set. If you need to make this modification, look in your sewing machine’s handbook for specific instructions.
If you’ve tried everything and still can’t get the lower thread tension right, see a sewing machine repairman; he’ll be able to fine-tune your machine’s settings and ensure that the upper and lower tensions are correctly balanced. Machine for sewing; Sewing Machine.
The need to change the sewing machine’s thread tension under unusual circumstances
Changing the thread, needle, or fabric on a sewing machine sometimes necessitates adjusting the upper thread tension. Certain stitching procedures also necessitate altering the upper thread tension.
Whenever you swap out your thread, needle, or fabric
Upper thread tension should be reduced for delicate materials like organza, satin, chiffon, and tulle as opposed to sturdy ones like denim and wool.
In addition, the top thread tension must be loosened for stretch textiles to work properly.
Since synthetic fibres are slightly elastic—unlike natural fibres—too much tension might stretch the thread and result in wrinkles in the fabric, hence the upper thread tension is often lower for synthetic fibre yarns.
Be sure the seam is even on a scrap of the same fabric before beginning to sew your garment, as switching needle sizes might alter the thread’s tension.