Using a sewing machine or overlocker, you may create a wide variety of hems. Let’s talk about some of the most common hems so that you may tailor your garments’ final touches to each individual project.
There is a crucial step in creating a lovely hemline that many of us either skip altogether or execute poorly. Constructing its hem in such a way that it is perfectly straight and regular is the goal. If you want to construct your hems correctly, you should know that there are a variety of tools available to help you. You need only become proficient in their proper application.
What exactly is a hem, and why is it so crucial?
A hem is a finished edge at the bottom of a garment. It follows that whether or not a hem is worked, a garment always has one. This advantage calls for our full focus and energy.
Why? The hem on your favourite pair of jeans comes to mind. The hems are tearing. A hem that has been properly sewn will hold up under a lot of stress. It prevents fraying at the fabric’s edges. Moreover, it helps the garment maintain its form. So you see: how to sew hems makes sense!
What is a hem allowance?
A hem allowance is necessary for each seam. The length between the seam and the bottom of the garment.
When cutting, remember to account for this hem allowance. Some patterns allow you to extend the hemline by drawing a hem allowance using a ruler.
Defining the hemline: The bottom edge of a hemmed garment is called the hemline.
Simple Hem
This variation is the “cleaner” method, and it works well for fraying fabrics.
Use the overcasting stitch on the serger or the overlock function on the sewing machine to finish the raw edge of the fabric.
To prevent the right side of the fabric from showing, iron the hem to the wrong side.
Simple folded hems work well with stretchy materials like jersey, sweatshirt material, fine knit, and the like. The overcasting stitch isn’t your only option; feel free to experiment!
then remember that some types of fabric necessitate trimming the raw edge before use.
Double folded hem
A quilted hem is another name for this finish. A double-folded hem is much simpler to stitch than an overcast one.
Create a 2 cm x 1 cm inward fold in the hem allowance.
Because it better encloses the raw edge of the cloth, the double-fold hem is more popular than the single-fold hem. However, a double-fold hem can be challenging to produce when working with a heavier-weight fabric.
A double-folded hem is achieved by folding the raw edge under once. Nonetheless, you do this again, folding the hem in half each time. The most notable feature is that you do all of these actions from the outside in. The result is a really relaxed style for your outfit. Thanks to the double fold, you won’t need to clip the raw edge where the paper was cut. With twin-seam topstitching, you get a neat, professional look thanks to the two parallel seams.
Sew a rolled hem
Dresses, tunics, and skirts benefit greatly from a rolled hem. However, they are also a great touch for completing scarves and shawls. Instead of a turned-in hem, this one has a narrow hem that’s trimmed with a zigzag stitch.
A rolled hem can be sewn in a variety of ways. A cranked hem is another name for this style.
When creating a rolled hem, a very narrow zigzag stitch is used, and the fabric is overstretched throughout the sewing process. This gives a wave-like effect on the hem.
This is not only a nice ornamental touch, but it also works wonderfully as a fray-prevention trim. A rolled hem looks great on just about everything, whether it’s a dress, a skirt, a pair of slacks, or even the sleeves and hem of a shirt for a child.

Raw edge trimmed
Unfinished or minimally finished raw edges look excellent on tops, bottoms, and dresses.
Finish the raw edge by sewing an overlock or other decorative stitch.
The raw edge is then finished off again in accordance with the ornamental seam you’ve chosen.
Keep in mind that the type of fabric you’re using will dictate the type of decorative stitch you use. Very fine ornamental stitches may be difficult to see on certain fabrics.
You can test out different stitches on a scrap of fabric to see what you like. For fraying fabrics, such as. To prevent the raw edge from unravelling after being cut, a tight stitch is ideal for cord or cotton.
Invisible hem
The threads in an invisible hem are not visible from the right side of the fabric. It works wonderfully on delicate textiles.
Creating an undetectable hem is a precise task that benefits from a modicum of practice. You can use a sewing machine or do it by hand.
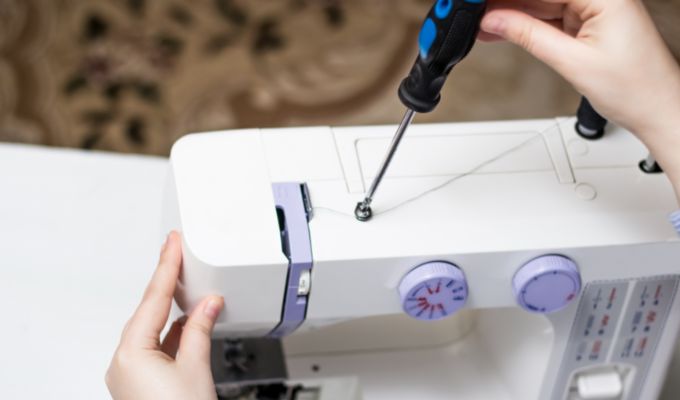
An overlocker and a blind hem foot may create a neat and secure finish for your seams. The challenge, as with a sewing machine, will be concealing the stitch on the wrong side of the fabric. The point of the guide can be adjusted with a screw located near the foot. When used correctly, this method can help you create a hem that is completely undetectable from the right side of the fabric.
Simple Trouser Hems
How purist are you? Do you prefer realistic depictions? You look best in modest lengths of fabric. The most fundamental type of pant hem is called a “simple hem,” and that’s exactly what it means. It is most common on various types of jeans (selvedge jeans, vintage jeans, etc.) and on chinos, a type of pants for men that combines formality with comfort.
Hemming pants is as easy as cutting them to length and folding the excess fabric inside. Both hand and machine sewing are perfectly acceptable methods. This hem is always between 1 and 2.5 centimetres in width.
One perk of the single hem is that it may be folded outward to create cuffs. This means it may be readily altered to fit with slacks. Here’s a neat tip: instead of using a regular sewing machine needle and thread for your hem, try using a blind stitching machine. Just enough to make your sober appearance stand out without being obnoxious.
Hand-turned Cuffed Hems
A cuffed hem is the simplest fashion to achieve. Sure enough, that’ll reveal the lining of your jeans. You can do this by making at least one outward fold at the bottom of your pants. Of course, if you want your hem to stay there, you shouldn’t be shy about giving it a few ironed strokes.
The cuffed hem is currently a major fashion trend that works well with an unstructured look. The sturdiness is up to your discretion. However, the height shouldn’t be more than 2.5 cm to 5 cm. If you’re a fan of bloated proportions, the 6 cm to 10 cm setbacks is for you. Whatever the case may be, this length of hemline works beautifully with every ensemble.
Rolled Hems
The term “rolled hem” refers to the same thing. Rolling the fabric’s edge over itself creates this extremely snug hem, which is pulled up and over the legs. It can be sewn with either a straight or zigzag stitch, according to personal preference. The usage of a serger is required for the creation of a rolled hem. However, a standard sewing machine can be used if you have more experience with stitching.
Keep in mind that the rolled hem looks best on fabrics that are thin, light, and flexible. That’s right; it works as well on either silk or cotton trousers. For maximum effect, you should expose your ankles without otherwise altering the look of your jeans. This hemline is perfect for the laid-back, casual, and urban look.
Machine Turned Cuffed Hems
This hem style is up there with the most sophisticated. Elegant pants, like those worn with suits, typically feature this detail. An outward fold of the pant hem, about 3 cm thick, is all that’s needed to create a cuff that can be turned on a sewing machine. While the length is consistent, the width varies from 2.5 cm to 5 cm. The perfect finishing touch is one that elevates your look.
The aesthetic is what sets the turn-up hem apart. Indeed, it serves as a good bridge between the jeans and the shoes, while also dressing the ankle. It has the added benefit of giving the pant legs more weight, which improves their drape.
The pin roll
As far as hemming styles go, this one is the most functional. This style is both urban and contemporary, making it look very on-trend. You can’t go wrong with pairing the pin roll with jeans or chinos. Pulling the surplus fabric to the rear creates an elevated and tightened appearance at the ankles, similar to the cuffed hem.
Ankles and shoes will be on display with this method. You are permitted to proceed to that height. You’re free to set your own height using the pin roll. That is to say, you are free to experiment with different lengths of rolled-up trouser legs.
Bound Hem
Sundresses, as well as other pieces of casual or playwear, benefit greatly from finished edges that are bound. The process of binding a hem or seam is straightforward. Start with a zigzag stitch or a serger to add rigidity to fabric that might ravel with time. Binding a seam ensures that the binding will be visible on the exterior of the finished product.
Install some bias tape, either prefabricated or homemade, to hide the unfinished edge. Complete the look by folding the tape under itself before you reach the end. That settles the matter, period. In addition to garments, bound edges are also useful for creating unique tablecloths. The use of bound hems is widespread in the craft world.
Ruler for Hemming
When finishing hems, a good ruler, ideally made of metal, is essential. Why? The reason is, you can just stick this ruler into your hem and iron right over it. The iron’s heat is transferred to the fabric via the metal. Faster fabric development thanks to this method!
In terms of the actual ruler, you may pick from a few different options. A so-called seam gauge, a little measuring tool that slides easily into the seam, is ideal for such fast inspections. You can see what the small hem size looks like here.
Certainly, this hem measurement is useful for brief hems, but I find it to be too eggy for my taste. That’s because I have a habit of sewing extremely lengthy hems whenever I make something to wear. A huge metal edger from Dritz was purchased, and markings were made for the hem widths most frequently used.
The Dritz hem gauge is not calibrated in centimetres but rather in inches. Nonetheless, that hasn’t dampened my enthusiasm. My hems have improved greatly since I started using this item.
Fantastically elegant seams can be sewn without a cover machine. And it’s huge assistance, of course! Even with a home machine, you can make professional-looking hems. Just say “twin needle,” and all your problems will go.
A twin needle is used to overcast the underside of the fabric and stitch the top. And all in a single sitting. This works wonders on almost any material, but it really shines on sweatshirts, jerseys, and the like.
Re-embroidery Needle
The touch-up needle was initially designed for free-motion quilting, but it is also helpful for topstitching hems. It has an extended needle eye and a somewhat rounded tip.
This enables the use of even bulkier yarns, such as type B for sewing denim yarns. After that, they are expertly directed through the eye to prevent thread tearing.
Walking Foot
For jersey and similar stretchy, slippery, and delicate materials, I recommend using a walking foot. That way, the fabric is delivered in a uniform manner.
This guarantees smooth seams and eliminates jersey waves. Almost any brand of sewing machine can use a walking foot. Both a narrow and broad top feed foot or OTF for short were included with my Janome.
Rolled Hem Sewing Machine Foot
Those who enjoy sewing with silk, chiffon, or other delicate fabrics should know that a rolled hem foot is essential when working with these materials to create garments like tunics, gowns, scarves, and shawls. It comes in a variety of widths to accommodate a variety of hem widths.
Tips For Sewing Hems
Ahead of beginning to stitch hems, consider the following advice:
- You don’t want to end up with something that’s too short because you accidentally cut off too much cloth, so be careful to mark the hem correctly using a sewing gauge or tape measure.
- When hemming a garment made of lightweight fabric, it is important to hang it up the night before and let it “drop.” That’s a must for every asymmetrical pattern!
- When hemming a garment, it’s best to have the wearer try it on so you can get an accurate marking of the hemline. If the cloth is not too delicate, you could use tailor’s chalk, a basting stitch, dressmaking pins, or clips. Having someone else do this for you is a good idea if the item is for you.
- Before beginning to hem, be certain the raw edge of the fabric is well-finished. A zigzag stitch, overlocker/serger, pinking shears, or hem tape would all work.
- Think about how wide you want the hem to be before deciding on a hem style. For each type of hem, I’ll explain what width is required.
- The hem of some garments requires interfacing. Fusible or sew-in interfacing can be used, but you should consider this and your fabric choice before you begin.
Comparison of Hand-Hemming and Machine-Hemming
Think about the purpose of the project when determining whether to use a hand hemmer or a sewing machine.
While a sewing machine makes quick work of attaching bias binding to a circle skirt, a blind hem on a draped silk jersey dress could be more your speed.
What matters is how you envision the finished garment looking once the hem is done.