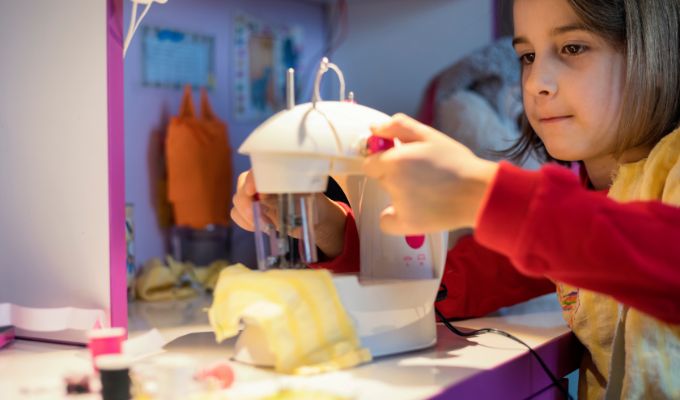
If you’ve bought a sewing machine, keep in mind that how well you take care of it will affect how comfortable you find it to use and how long it lasts. We provide you with a quick, easy guide to maintaining your device so that nothing can prevent you from starting your creations.
How often a sewing machine needs to be maintained
First of all, a well-maintained sewing machine is one that receives routine maintenance. Given that the frequency of maintenance also depends on your rate of use, it would not be reasonable to give you a general frequency of use in months. It stands to reason that a casual seamstress will take better care of his equipment than a regular or skilled seamstress.
If an experienced seamstress can tell from experience when her machine needs a little maintenance, a novice can easily miss it. Our group suggests that you base your decisions on how many hours you use something. Every 10 to 15 hours of sewing, your machine needs to be serviced. Despite the fact that this time frame is relatively brief, you can prolong the life of your sewing machine.
Typically, a service consisting of internal cleaning and oiling can be done once each year, or after every 10 – 15 hours of sewing.

Safety measures before maintenance
Make sure to first unplug your computer. To reduce the possibility of accidentally starting the machine on one of your fingers, take this precaution. On older sewing machines, threads can also get stripped. There is no debate about assuming even a small risk of electrocution.
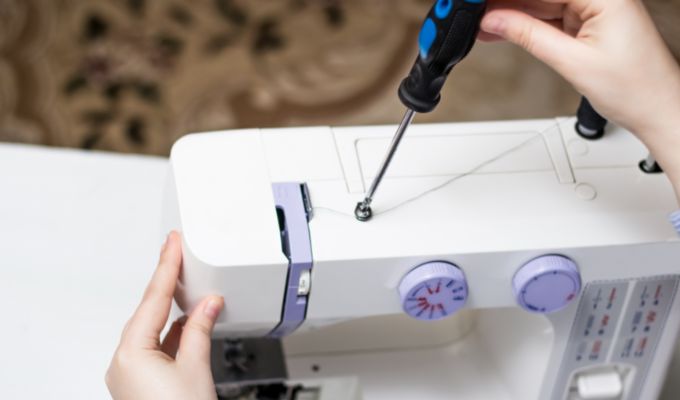
The machine may be difficult to disassemble depending on the model. To avoid any issues during reassembling, we suggest that you take pictures at each stage of disassembly. Be aware that some brands, frequently reputable ones, offer a written or visual disassembly and reassembly guide.
Steps for sewing machine upkeep
Two parts of a real interview will be conducted. The equipment needs to be cleaned and then lubricated.
Taking care of the sewing machine
Sewing using a machine that’s clean and tidy on the outside is nice, but how clean is the inside? Be aware that your machine needs your full attention inside as well.
After the machine has been disassembled, we suggest that you thoroughly vacuum the area, as there will be a build-up of lint and dust. The next step is to use a dry cloth to scrub each corner thoroughly.
Be cautious; in some guides, it’s suggested that you carry out this step with a damp cloth. Unless you’re persuaded not to use the machine for a few days, we don’t advise it. Also, with a wet machine, you run the additional risk of oil not bonding to the components and the risk of oxidation of metallic parts. Therefore, a powerful vacuum nozzle and a dry microfibre cloth should do the trick for cleaning the inside of your machine.
Lubrication
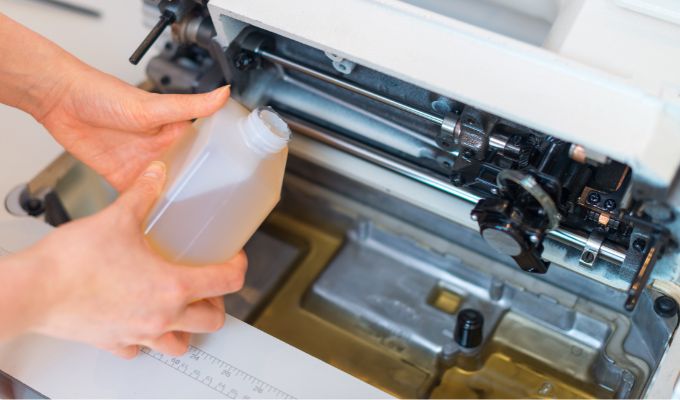
The metal components inside the sewing machine will need to have a few drops of a specialised lubricant oil applied to them. To make sure that all of the machine’s parts are lubricated, feel free to manually move the needle up and down.
The smooth passage of the thread against its various components as well as the proper operation of mechanical movements depends on lubrication, oiling, or greasing.
Don’t use any old oil to maintain the internals of your sewing machine, make sure to use an oil that is compatible with sewing machines for best results.
Restart
You must restart your sewing machine after it has been put back together. Make sure you have replaced each disassembled component correctly beforehand. After reconnecting the power, sew on a piece of leftover fabric.
It frequently happens that you detect grease or oily residue when the sewing machine makes its first stitch after maintenance. It’s a good idea to run some striches through some waste scraps of fabric to help mop up any oils before using the machine.
For precautions regarding maintenance, always check the user manual.
In any case, before beginning your first interview, we always suggest that you review your instructions for use. While some brands will advise you, others will caution you and draw your attention to certain model-specific details.
Before purchasing a new sewing machine, don’t be afraid to read customer reviews on the model you have your eye on. If this is your first sewing machine, you can avoid the models that cause the most frustration among experienced sewers by choosing one that is simple to maintain.
Use Your Machine With Care
This kind of maintenance is only a small part of taking care of your sewing machine. You will also need to be careful to use it properly in order to extend its lifespan. This final cautionary note from our team refers to the fact that novice machines frequently exhibit weaknesses due to misuse quite early.
The following mistakes should be avoided in order to protect your sewing machine:
Use the universal needle to sew all types of materials. Yes, for the most part, it functions without damaging the needle. With the exception that you can push your engines harder than necessary and risk a costly break. Using the correct sewing needle size and type will help prolong the lifespan of your motor.
Continually use the same settings. Again, if you don’t adjust the stitch or thread tension in accordance with your work or your thread, your machine may suffer in addition to the sometimes unsightly aspect of your work.
Using a thread of subpar quality. Low-quality threads can cause your machine to become overloaded, and threads break, tangle, and skip stitches, necessitating more frequent maintenance and repairs. They may also damage the motors by becoming lodged in the needle’s eye.
You are now prepared to start a brief pampering session for your sewing machine. Prepare yourself for the first disassembly with patience, and everything will eventually become second nature to you. Call a specialist if you don’t feel prepared to begin.