
Ironing is a critical step in making your sewing and quilting projects the best they can be. Creating well-creased, wrinkle-free projects is easiest when you have an iron that works quickly and effectively. For that, you’ll want one of the top irons for quilting and sewing. Here are four models that can help you get the job done.
1. Best Overall: PerfectCare Compact Steam Generator Iron
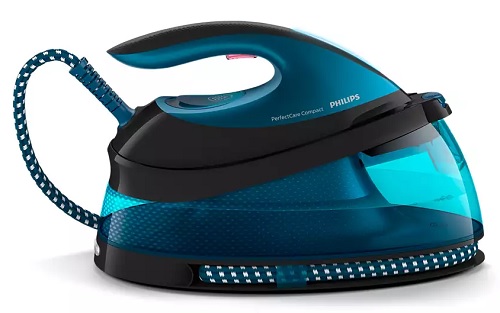
When it comes to irons for quilting and sewing, you’ll want to make sure to choose one with a great steam function. Dry ironing has its place — and may be necessary for certain fabrics — but steam can be a powerful tool for getting out wrinkles and forming crisp creases. You’ll find that the Philips PerfectCare Compact Steam Generator Iron has what it takes.
An iron’s steam output is measured in grams per minute. This unit is a steam generator iron rather than a standard iron. Steam generators typically get top marks for output, pressure, and heat resulting it better wrinkle and crease removal.
PerfectCare produces 120 grams per minute in standard mode. That’s an impressive amount. Plus, the PerfectCare steam iron can reach strengths of up to 400 grams per minute when you use the burst mode. Don’t worry; the water tank holds 1,500 millilitres of water, so you won’t need to refill it too often.
Those who frequently switch from one type of material to another will appreciate this iron’s OptimalTEMP technology. You’ll never have to manually input your fabric type to achieve the right temperature. Instead, this unit can automatically sense that and adjust the heat accordingly.

If you get together with friends to sew, you’ll appreciate this iron’s portability options. Yes, it’s a full-size unit rather than a travel model. But as far as full-size steam generator irons go, this one is reasonably compact. Plus, there’s a lock that holds the iron and the base together for easy transport, and the whole thing weighs just 1.2 kilograms.
The PerfectCare is an all-around impressive iron that will help you produce top-quality quilts.
2. Steam Iron Runner-Up: Philips Azur Advanced
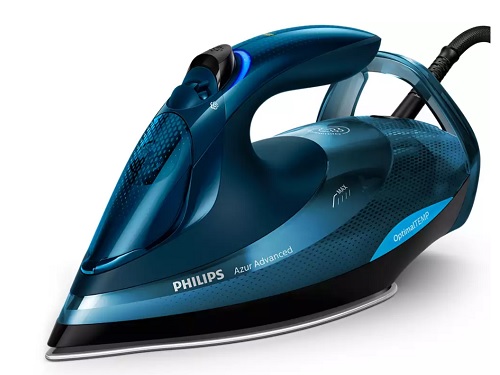
Another Philips product, the Azur Advanced, could be a good choice if you’re looking for effective results at a slightly lower price point. However, unlike PerfectCare, the Azur is a standard iron rather than a steam generator iron.
Even still, you can expect decent steam output from this iron. In regular mode, it puts out 55 grams per minute. You’ll get a quick puff of 240 grams per minute when you activate the burst feature.
When you’re on a sewing deadline, every second counts. Fortunately, this iron has 3,000 watts of power, which allows it to heat up quite quickly. That’s even more wattage than the PerfectCare.
Just like the PerfectCare steam generator, this iron gives you the convenience of OptimalTEMP technology. Even if you switch from lightweight muslin to thick denim, you won’t have to adjust the temperature settings. The iron can take care of that for you.
The multilayer soleplate includes a titanium layer and scratch-resistance features. It’s named SteamGlide Plus because it’s designed to slide almost effortlessly across your material. If you’re ironing one quilt square after another, your hand will appreciate the ease.
Another great feature of the Philips Azur iron is that it has a 3-meter cord. Even if there’s no available outlet nearby, you may still be able to position your ironing board right next to your sewing station.
This Philips unit might be an ideal match if you’re in the market for a standard iron rather than a large steam generator with powerful steam.
Cordless Steam Iron for Pro Sewists: TEFAL Freemove Air FV6551
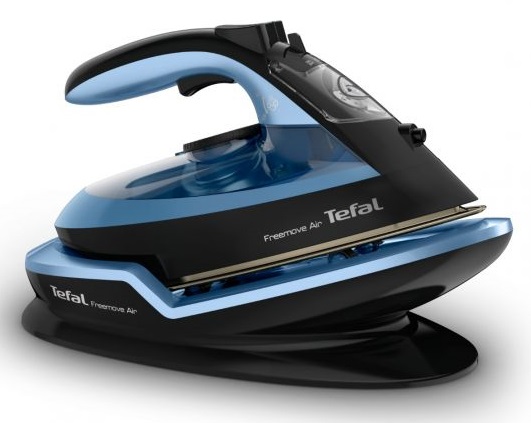
On the one hand, long iron cords are convenient for reaching outlets. On the other hand, they can also get in the way of what you’re working on. To avoid that trouble, try a cord-free iron. The TEFAL Freemove Air could be a great option.
Remember that you still need to be near an outlet to use this iron. While the iron itself is cord-free, the base needs to be plugged in. The iron holds a charge for about 30 seconds. Once you’ve smoothed one section, you can set the unit on its base while you reposition the fabric. The iron will quickly recharge so that it’s ready to tackle the next part of your material.
The standard steam level for this iron is 35 grams per minute. You’ll get 190 grams per minute when you activate the steam boost. Those ratings aren’t bad, but they’re lower than for corded irons. You’ll have to decide what’s more important to you: high steam output or cordless convenience.
A ceramic soleplate on this iron is designed to move smoothly across your fabric. It also has an anti-drip feature. That helps keep spots of water off your material as you work. This feature could be especially important when you’re pressing delicate fabrics.
If you tend to get wrapped up in your stitching, this iron has a handy shut-off feature. Whether you’ve left it on the ironing board or the base, it will power down before scorching the surface below.
Overall, Tefal Freemove steam iron isn’t quite as powerful as corded varieties, but it’s a solid choice for cord-free convenience while working around a sewing machine station.
Best on a Budget: ANSIO Mini Steam Iron for Quilting and Sewing
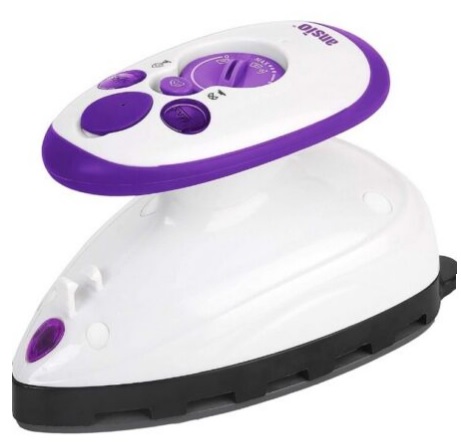
Yes, the ANSIO Mini Steam Iron is affordable. That’s not all it has going for it, though. It’s also designed for travel so that you can take it to craft nights and quilting bees.
This small iron weighs just over half a kilogram. The longest side is only 13.5 centimetres long You’ll have no trouble fitting this small iron in your bag as you head out the door.
There’s also a clip to hold the 1.9-meter power cord. That way, you can wind the cord and secure it in place before packing the iron for travel.
You may attend sewing conventions or other big meetups if you’re a serious quilter. Even if you’re going abroad, you’ll want to pack this iron with your craft supplies. There’s a voltage switch so that you can use it with different countries’ electrical systems (provided that you have the correct plug adapter).
The travel iron doesn’t offer continuous steam output but has a steam function. Whenever you need a puff of steam for a stubborn crease, just press a button to release the vapour.
Variable temperature settings are another feature that this compact iron offers. You can turn the adjustable dial to low, medium or high — or a setting in between. The top temperature that this until reaches is 230 degrees Celsius.
This iron has a unique ergonomic handle and a ceramic plate for easy manoeuvring. It even offers an anti-drip system.
If you’re an on-the-go quilter, it’s worth adding this iron to your collection.
Should You Iron Fabric Before Sewing?
Yes, it’s important to de-wrinkle your fabric before beginning a sewing project.
More specifically, it’s smart to press your fabric. There’s a difference between ironing and pressing, and it could make a difference in your finished product.
In ironing, you slide the iron back and forth across the material. It works well for finished garments. However, when you iron unfinished pieces of fabric, you risk stretching or pulling them against their grain. That could affect how well two pieces of material go together.
On the other hand, pressing involves setting the iron straight onto the material to press out wrinkles and set seams. At times, you may need to apply some light pressure as well.
But, yes, ironing or pressing fabric before sewing is quite important. Removing wrinkles is important for making sure your pieces line up correctly and will lay right in the end. Pressing is also a helpful technique for forming creases
After putting in your stitches, the iron is essential for ensuring that each seam is crisp. That leads to professional-looking results.
How to Clean Melted Fabric off Your Steam Iron
When ironing, always keep the pressure as light as possible, and don’t turn up the temperature beyond the setting intended for your fabric type. Following those steps, hopefully, you can avoid too many melted-fabric incidents. When an accident does happen, though, you’ll need to know the easiest way to clean it.
There are actually a few methods you can use. Whichever you choose, take care not to scratch the soleplate. You’ll want to choose a cleaning method that is strong enough to remove the melted material without causing damage to your iron.
Try making a paste of two parts baking soda and one part water. Use an old toothbrush to rub this mixture on your iron’s soleplate using circular motions. Once you’ve removed the melted fabric, use a damp cloth to wipe the soleplate. Dry the iron before using it.
Another option is to put white vinegar on a cloth and rest your iron on top of it. If you let it sit for half an hour, you may be able to wipe away the melted residue without scrubbing.
You can also try freezing the iron. Set the bottom in a shallow tray of ice cubes. After about 10 minutes, you should be able to chip the melted fabric away. You may need to follow up with the baking soda or vinegar approaches.
How to Iron Quilting Seams
After you’ve stitched two materials together, it’s a good idea to iron press the seams. That gives them a well-finished look.
When you press, set the iron straight down onto the material. Apply gentle pressure. Lift the iron, adjust its position, and set it back down on the fabric. Repeat this process until you’ve pressed along the full length of the seam.
It’s smart to press the seam in several directions. First, flip the fabric over to the reverse side. Leave the two pieces of material together just as they were when you sewed them, and press along the length of the seam.
After that, fold the seam allowance to one side or spread it open. Whichever you choose, press the flaps flat against the fabric.
Finally, if the material isn’t too delicate, turn your project over to the right side and do one more round of pressing from the top down.
Make sure to follow these tips:
- Start with gentle pressure and increase it slowly as needed.
- Match the iron’s temperature setting to the fabric.
- To protect your fabric, do the majority of your ironing on the reverse side if possible.
- Don’t press down on pins. Doing so could damage the fabric.
When you’re working in small or intricate areas, you may want to use specialized tools, such as a presser bar or a pressing ham.


